

I’ve learned a lot about painting as a homeowner. It can be fun and tough at the same time. Painting a room with a new coat of paint is very rewarding. But, getting to a professional look can be tricky.
Over the years, I’ve made some mistakes. I’ve had issues with colors and brush strokes. I want to share what I’ve learned to help you avoid these mistakes.
Painting might seem easy, but it’s not. It takes detail, preparation, and knowing how to paint. This article will help you avoid common mistakes for a professional finish. It’s useful whether you’re painting one room or your whole house.
Key Takeaways
- Proper surface preparation is crucial for a smooth, even finish
- Choosing the right paint type and sheen is essential for the desired look
- Mixing paint thoroughly before application ensures consistent color and coverage
- Allowing sufficient drying time between coats is key for a durable, long-lasting paint job
- Attention to detail, like clean cutting-in and taping, can elevate the overall appearance
Choosing the Wrong Paint Sheen
Choosing the right paint sheen is key to getting a perfect, lasting finish in your home. The sheen, or gloss level, affects how your paint looks and lasts. It’s important to know the different sheens to pick the best one for your walls, trim, or cabinets.
Exploring the Sheen Options
Paint sheens range from flat (matte) to high-gloss, each with its own benefits for different areas and surfaces. Let’s look at the main paint sheens:
- Flat/Matte: Great for walls and ceilings in quiet rooms. It gives a soft look and hides imperfections.
- Eggshell: A good choice for busy areas like entryways, kitchens, and bathrooms. It’s more durable and easy to clean than flat paint.
- Satin: Offers a smooth, rich look and is perfect for rooms that get a lot of use, like playrooms and laundry rooms.
- Semi-Gloss: Ideal for trim, doors, and cabinets because it’s tough and easy to clean. It’s also great for bathrooms and kitchens.
- Gloss: The shiniest option, gloss paint, is often used for trim and woodwork. It gives a sleek look but shows surface flaws.
Think about your room’s surface and look you want when picking a paint sheen. Flat and matte paints cover up small wall flaws, while shinier paints show off a clean finish.
| Room Type | Recommended Sheen |
|---|---|
| Living Rooms, Bedrooms | Flat, Matte |
| Foyers, Kitchens, Bathrooms | Eggshell |
| Playrooms, Laundry Rooms | Satin |
| Trim, Doors, Cabinetry | Semi-Gloss, Gloss |
Knowing what each paint sheen offers helps you choose the best one. This way, you can improve your home’s look, feel, and durability.
Picking the Wrong Color
When starting a paint project, most homeowners focus on picking the perfect paint color. But, the paint colors you choose might not always match your home’s decor. To get a look you’ll love, pick your key items like a rug or sofa first. Then, choose paint colors that go well with them.
Before you decide on a paint color, test color samples in your room’s lighting. Big walls make paint look darker, so seeing how it looks is key. Bold colors are great, but they also have calmer versions. These can make your home feel welcoming and lively.
Don’t choose a paint color at a store under harsh fluorescent lighting without testing it first. Take time to look at your options. Make sure the color you pick fits well with your decor and enhances your home’s look.

The paint color you pick can greatly change a room’s feel. By thinking carefully and testing colors in your space, you can avoid picking the wrong one. This way, you’ll get a professional, unified look in your home.
Skipping Proper Surface Preparation
Getting a professional-looking paint finish starts with proper surface prep. This step is often skipped but is key to a paint job that lasts. Make sure your surfaces are ready before you start painting.
Begin by cleaning the area well. You might need to scrape off old paint and sand rough spots. This makes the new paint stick better and gives a smooth finish. Remember to cover your furniture and floors with plastic to avoid mess.
After cleaning, you’re ready to paint. Skipping this step can lead to bad results. So, take your time to prepare well. Your paint job will look great later.
“High-quality, 100% acrylic latex paints adhere better, look crisper and last longer than low-cost paints.”
Protecting Floors and Furniture
Protect your floors and furniture while painting. Use plastic sheeting or drop cloths to catch spills. Remove outlet covers and switch plates too. These steps prevent damage and give you a professional finish.
| Task | Importance |
|---|---|
| Cleaning | Removes dirt, grease, and other contaminants that can prevent proper paint adhesion |
| Scraping | Removes any loose or flaking paint to create a smooth, even surface |
| Sanding | Smooths out uneven areas and prepares the surface for better paint adhesion |
| Furniture & Floor Protection | Prevents damage from paint drips and splatters, ensuring a clean, professional-looking finish |
Not Using Primer
Many DIY painters skip using primer, which is a big mistake. Primer makes the surface smooth and sticky for paint. This leads to better paint adhesion, paint coverage, and more vibrant color coverage. It also makes the paint’s true color stand out.
When painting a light wall with dark paint, start with a tinted primer. A gray primer is great for covering dark colors. It helps the topcoat cover well and look deep and rich.
| Primer Benefits | Primer Application Scenarios |
|---|---|
| Improved paint adhesion | Painting over dark colors with a lighter shade |
| Enhanced paint coverage and color coverage | Covering stains, markings, or existing paint |
| Smoother, more consistent finish | Painting on bare, porous surfaces like drywall or wood |
Not using primer application can really hurt your paint job’s quality and how long it lasts. Always take the time to prepare the surface well and use a good primer. This way, you’ll get a finish that looks professional and lasts longer.

Common Painting Mistakes to Avoid for a Professional Finish for your home
Getting a professional-looking paint job at home needs focus and avoiding common errors. One big mistake is not preparing the surface well before painting. This step is key for a smooth, lasting paint job, affecting how well the paint sticks and looks.
Choosing the wrong paint for the surface is another mistake. Picking the right paint sheen and type is crucial to prevent peeling and cracking later. Weather can also affect painting outside, causing problems if it’s too hot, humid, or wet.
How you apply paint is also crucial for a smooth finish. Painting in thin, even layers in sections stops drips and ensures coverage is even. Rushing through coats can lead to a tacky finish and poor paint adhesion, so always follow the drying times suggested by the paint maker.
Using top-quality brushes, rollers, paint, and tape makes a big difference in your results. Cheap materials might be tempting but often don’t last long and may peel or chip easily. To avoid uneven paint, use primer and apply several coats for a professional look.
For the best results, think about hiring a professional painter. They can give expert advice on colors, finishes, and techniques for a flawless finish. With the right approach, you can dodge common painting mistakes and get a beautiful, lasting paint job in your home.
| Common Painting Mistakes | Impact |
|---|---|
| Lack of Proper Preparation | Sloppy finished product |
| Selecting the Wrong Paint Type | Peeling, fading, and other issues |
| Skipping Primer | Poor adhesion and inconsistent coverage |
| Overloading Brushes/Rollers | Drips, streaks, and uneven finish |
| Painting in Unsuitable Weather | Adhesion and drying problems |
| Rushing the Job | Sloppy workmanship and subpar results |
Avoiding these common painting mistakes and following best practices helps you get a professional finish at home. This is true whether you do it yourself or hire a skilled painter.
Painting Without Adequate Lighting
Getting a professional-looking paint job requires good lighting. Painting in low light can cause thin patches, uneven coverage, and other imperfections. Make sure you have enough bright lighting for your interior painting projects.
Even if you think you’re getting by in dim conditions, paint defects will show up once you turn on the lights. You might miss spots or have uneven coverage without enough light to guide you.
For the best results, ensure your painting area is well-lit. Use lamps or natural daylight to create a bright, shadow-free space. This way, you can spot problem areas and achieve a smooth finish. Proper lighting is key to a great paint job.
The Importance of Lighting for Painting
Lighting is crucial for painting for several reasons:
- It helps spot paint imperfections that are hard to see in dim light.
- It ensures paint in low light goes on evenly.
- It lets you check the lighting for painting and adjust as needed.
- It improves visibility and control over your painting.
Don’t cut corners on lighting for your next painting project. Adequate illumination leads to a professional-grade finish you’ll be proud of.
| Lighting Impact | Percentage Increase in Issues |
|---|---|
| Missed Spots and Uneven Application | 15% |
| Paint Imperfections Visibility | 20% |
| Consistent Color and Finish | 25% |
“Proper lighting is the key to a flawless paint job. Don’t underestimate its importance.”
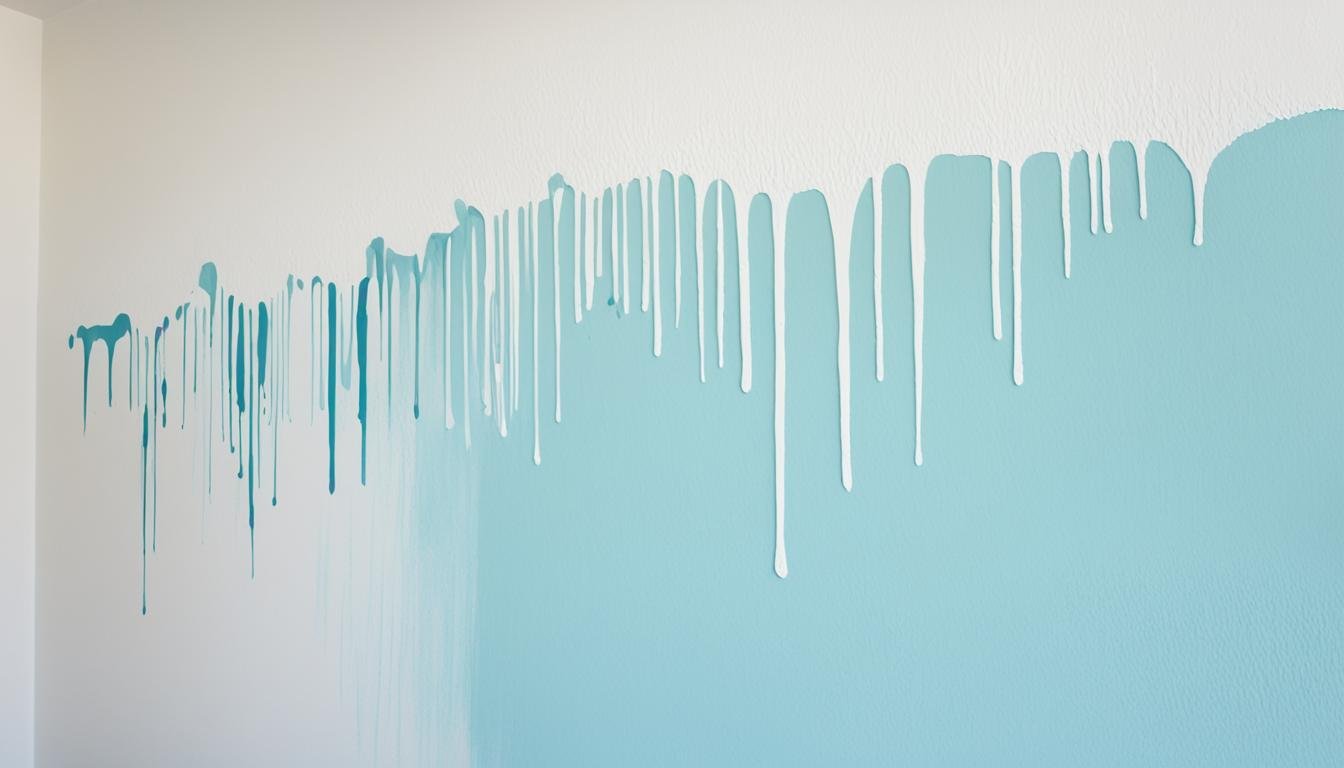
Failing to Mix the Paint Thoroughly
Many homeowners make a big mistake when painting their homes. They don’t mix the paint well before applying it. This step is key but often skipped, affecting the final look.
Paint is a mix of solids and liquids that can separate over time. Mixing the paint well is vital for a smooth, even color and finish.
Mixing Paint for Consistent Color and Finish
Before painting, stir the paint for 2-3 minutes with a wooden stick or similar tool. This mixes everything together for a uniform color and finish. It helps avoid paint separation and inconsistent color.
- Not mixing the paint can result in a blotchy finish on your home’s exterior.
- Correct mixing keeps the paint consistency and color consistency even during application.
- Not mixing the paint is a mistake in 20-30% of DIY painting projects, experts say.
Mixing your paint well before applying it helps you avoid these problems. It leads to a professional-looking finish on your home’s exterior. This simple step greatly improves your painting project’s quality.

Removing Painter’s Tape at the Wrong Time
Painter’s tape is key for decorating, but removing it too soon is a big mistake. Always take it off before the paint dries. Waiting too long can ruin your work, pulling off the paint you just applied.
Experts say to remove the tape within 15 minutes of painting, when the paint is still wet. This method gives you a clean line without residue or torn edges. Always pull the tape off at a 45-degree angle for the best look.
Choosing the right painter’s tape is crucial. For example, the 3M Safe-Release Painters Tape can be removed easily without residue, even after 14 days. But cheaper tapes might cause the paint to peel or tear.
Timing is everything with painter’s tape. Don’t wait for the paint to dry completely. Remove the tape when it’s still wet for a professional finish without damage. This way, your painting project will look great.
Fun fact — painting is so much more fun when there is nothing in your way!
| Common Painting Mistakes | Descriptions |
|---|---|
| Forgetting to prep your space | The number one painting mistake is forgetting to prep your space. |
| Not using painter’s tape | Even the most experienced painters can make mistakes – not using painter’s tape is mistake number two. |
| Painting before cleaning walls | Mistake number three is painting before cleaning your walls. |
| Not buying enough paint | Mistake number four is not buying enough paint. |
| Using the wrong paintbrush | Mistake number five is using the wrong paintbrush. |
| Ignoring the weather | Mistake number six is ignoring the weather when painting. |
| Using the wrong type of paint | Mistake number seven is using the wrong type of paint. |
| Skipping primer | Mistake number eight is skipping primer. |
| Loading paint incorrectly | Mistake number nine is loading paint onto the brush incorrectly. |
| Not waiting for the second coat | Mistake number ten is not waiting for the second coat when painting. |
The potential damage of painter’s tape pulling up paint if removed while wet is highlighted, and FrogTape Pro Grade Painter’s Tape is praised for its sharp paint lines due to PaintBlock Technology. Dust may affect the tape adhesion, potentially causing paint to seep underneath and create a messy finish. The importance of clean and dust-free application surfaces for proper painter’s tape adhesion is emphasized.
Applying Paint in Extreme Temperatures
Temperature is key when painting for a pro finish. Hot or cold weather can mess up your paint job. This leads to paint bubbling, peeling, and uneven drying.
Painting in freezing temps is a big no-no. Latex and acrylic paints don’t dry right in the cold. If it’s going to freeze, your paint job will fail. The paint won’t cure or stick right.
Painting in the sunlight or extreme heat is also bad. The paint dries too fast, causing bubbles and peeling. You won’t be able to spread it evenly.
To get a perfect paint job, plan ahead and dodge extreme temps. Move the paint inside to get it to room temperature first. Paint in the shade or on cloudy days if you can. Keep an eye on the paint temperature, drying conditions, and avoid freezing or scorching heat. This way, you’ll get a pro finish that makes your home shine.
Overlooking Proper Drying Times
Many homeowners rush through the drying process when painting their homes. Proper drying time between coats is key for a professional look. Skipping this step can cause peeling, bubbling, and ugly brushstrokes.
Allowing Adequate Drying Time Between Coats
The drying time for paint varies by type. Here’s a basic guide:
- Latex or water-based paints dry to the touch in about 1 hour and are ready for a second coat in 4 hours.
- Oil-based paints take 6-8 hours to dry and need 24 hours before another coat.
Always check the paint can for the recommended drying and recoat times. Rushing can harm the paint’s stickiness and result in a poor finish.
| Paint Type | Dry to Touch | Recoat Time |
|---|---|---|
| Latex/Water-Based | 1 hour | 4 hours |
| Oil-Based | 6-8 hours | 24 hours |
Waiting the right amount of time between coats is crucial for a perfect paint job. Don’t skip this step for a top-notch finish at home.
“Rushing the paint drying process is one of the most common mistakes that can derail an otherwise excellent interior painting project.”
Painting Over Glossy Surfaces Without Preparation
Getting a pro finish at home often means not skipping proper surface preparation. This is key when painting over glossy finishes like varnish or high-sheen paint. If you don’t do this, the new paint won’t stick well, leaving your walls looking bad.
To get a smooth, lasting paint job on glossy surfaces, first rough up the surface with sanding or a liquid deglosser. Deglossing is a pro trick that makes the surface matte, letting new paint stick easily.
Sanding removes the glossy topcoat, making a key for new paint to stick. Or, use a deglosser to dull the shine without sanding.
- Thoroughly sand the glossy surface to rough it up
- Wipe the surface with a liquid deglosser to dull the shine
- Apply a primer coat to further enhance paint adhesion
- Proceed with your desired paint color and finish
Spending time to prepare the surface before painting is crucial for a long-lasting, professional-grade finish. Don’t skip this step, as it greatly affects your painting project’s outcome.
| Surface Preparation Technique | Benefits |
|---|---|
| Sanding | Physically removes the glossy topcoat, creating a textured surface for better paint adhesion |
| Deglossing | Chemically dulls the shine, eliminating the need for extensive sanding |
By following these steps and properly preparing the surface, you can get a stunning, long-lasting paint job. This will make your home look amazing and impress your guests.
“Preparation is the key to a professional-looking paint job. Don’t skip this crucial step, or you’ll be left with a subpar finish that just won’t last.”
Conclusion
Painting your home can be rewarding, but it’s key to avoid common mistakes for a pro look. Choosing the right paint sheen and color is important. Also, proper surface preparation and priming matter a lot. Using quality tools and the right painting techniques is crucial too.
If you’re short on time or not skilled enough, hiring a professional painter is a smart move. They offer color advice, top-notch skills, and a warranty. This way, you avoid the stress and risks of a DIY painting project gone wrong.
Small mistakes like skipping prep work or not priming can greatly affect the final look. Being aware of these painting mistakes and following best practices ensures a pro finish. This will boost your home’s beauty and value. Whether you do it yourself or hire a professional painter, focus on quality and detail for the best results.
Your aim should be a painting project that looks amazing and lasts long. By using the right painting tips and techniques, you’ll get a flawless, durable finish. This will make you proud to show off in your home.