

Creating with your own hands is truly rewarding. Imagine sitting in a deck chair you made, enjoying the sunset. This chair is not just any chair—it’s your personal escape, crafted with love by you.
You’ve dreamt of enhancing your patio with your own creation. Now is your chance! This DIY making an outdoor deck chair guide offers more than just steps; it gives you the freedom to realize your own unique vision. Whether it’s your first outdoor furniture project or you are an experienced maker, this deck chair tutorial is perfect for you to build your own deck chair.
Why buy a chair when you can make one? The joy of lounging in a DIY patio chair that suits your style is unmatched. This outdoor chair building guide empowers you to create and enjoy your own outdoor haven. So, let’s roll up our sleeves and embark on a journey that brings not only a new piece of furniture but also pride and stories to share.
Key Takeaways
- Unleash the joy of hands-on creation with a comprehensive guide to DIY deck chair plans.
- Bring individual style and comfort to your outdoor space with a self-made deck chair.
- Enjoy the cost savings and personal satisfaction of a DIY outdoor furniture project.
- Gain the confidence to tackle more outdoor chair DIY projects with our step-by-step guide.
- Create a long-lasting and stylish addition to your patio through accessible DIY patio chair instructions.
- Revel in the achievement of turning simple materials into an elegant outdoor deck chair.
An Overview of DIY Outdoor Furniture Projects
Making your own homemade patio seating can really change your outdoor space. It gives you the advantages of DIY outdoor furniture. You get both the benefits of building your own deck chair and the chance to make your outdoor area fit your own style and needs.
Benefits of Homemade Patio Seating
Starting on DIY projects can be really rewarding. Making your own homemade patio seating lets you enjoy many advantages of DIY outdoor furniture. For one, it’s more affordable; making your own stuff can save you a lot compared to buying from stores. Besides saving money, the benefits of building your own deck chair include feeling proud and the happiness of making your outdoor space truly yours.
Variety of Styles for Outdoor Chairs
The world of DIY outdoor chairs is filled with different styles of outdoor chairs. There are many design options for DIY deck chairs for each look. Whether it’s modern loungers or classic Adirondack chairs, every homeowner can find a style they love. Choosing a style that fits your outdoor space is key to starting your DIY project right.
Customization Options to Match Your Outdoor Decor
DIY projects let you customize your space like no other. With customization options for outdoor chairs, you can make your outdoor area perfectly match your decor. You pick the materials, colors, and patterns that reflect your style. This means your personalizing DIY patio seating work ends up creating a really unique and welcoming space.
Designing Your Outdoor Deck Chair
When you start designing your deck chair, you need a good plan. It’s important for creating a comfy and useful outdoor chair that fits your life. Think carefully about the details of deck chair design before you begin. This careful planning is worth it.
Imagine relaxing in your backyard. Do you see yourself soaking up the sun or reading in the shade? These thoughts will help you decide how high the seat should be, how the backrest tilts, where to place armrests, and the overall size of your chair.

| Feature | Function | Details |
|---|---|---|
| Seat Height | Comfort | Enough clearance to sit comfortably without strain |
| Backrest Angle | Ergonomics | Slightly reclined for relaxation, supporting the back |
| Armrests | Support | Positioned to rest arms naturally and assist in standing up |
| Overall Size | Space Efficiency | Proportionate to your outdoor space, offering enough room to move around |
Creating a detailed plan is the first big step. Measure carefully and sketch your design. Include everything from the table. A well-made chair is more than furniture. It’s a spot just for you, inviting you to unwind.
Choosing the Right Materials for Your Outdoor Chair
When you start making a DIY outdoor chair, picking the right materials is key. You might be doing this for fun or as a pro. Knowing about the best woods and other materials is crucial. It helps your chair stand up to the weather.
Understanding Wood Selection: Durability Matters
Picking the right wood is a big deal. It affects how long your chair will last outside. Think about the weather, how much care you want to do, and other needs. Hardwoods like teak and cedar are great for the outdoors. They last a long time.
The Pros and Cons of Different Lumber Types
Understanding the good and bad points of cedar, teak, and redwood helps you choose. Here’s a quick overview:
- Cedar: Looks great and smells nice. It fights rot and bugs well but might turn gray if not cared for.
- Teak: Super durable and fights the weather well. It’s the top choice for many but can be costly.
- Redwood: Strong and doesn’t warp much. Finding and paying for it can be hard, though.
Alternatives to Wood: Exploring Other Materials
Looking beyond wood, there are cool new choices. Composite materials mix wood’s look with synthetic benefits. They’re easy to take care of, good for the planet, and liked by many DIY fans.
| Material | Durability | Weather-Resistance | Maintenance | Cost |
|---|---|---|---|---|
| Cedar | High | Good | Medium | Medium |
| Teak | Excellent | Excellent | Low | High |
| Redwood | High | Excellent | Medium | High |
| Composite | Excellent | Excellent | Low | Medium-High |
Wood or composites, knowing what you’re using is important. Think about how it looks and works over time. This ensures your outdoor chair lasts and shows your craftsmanship.
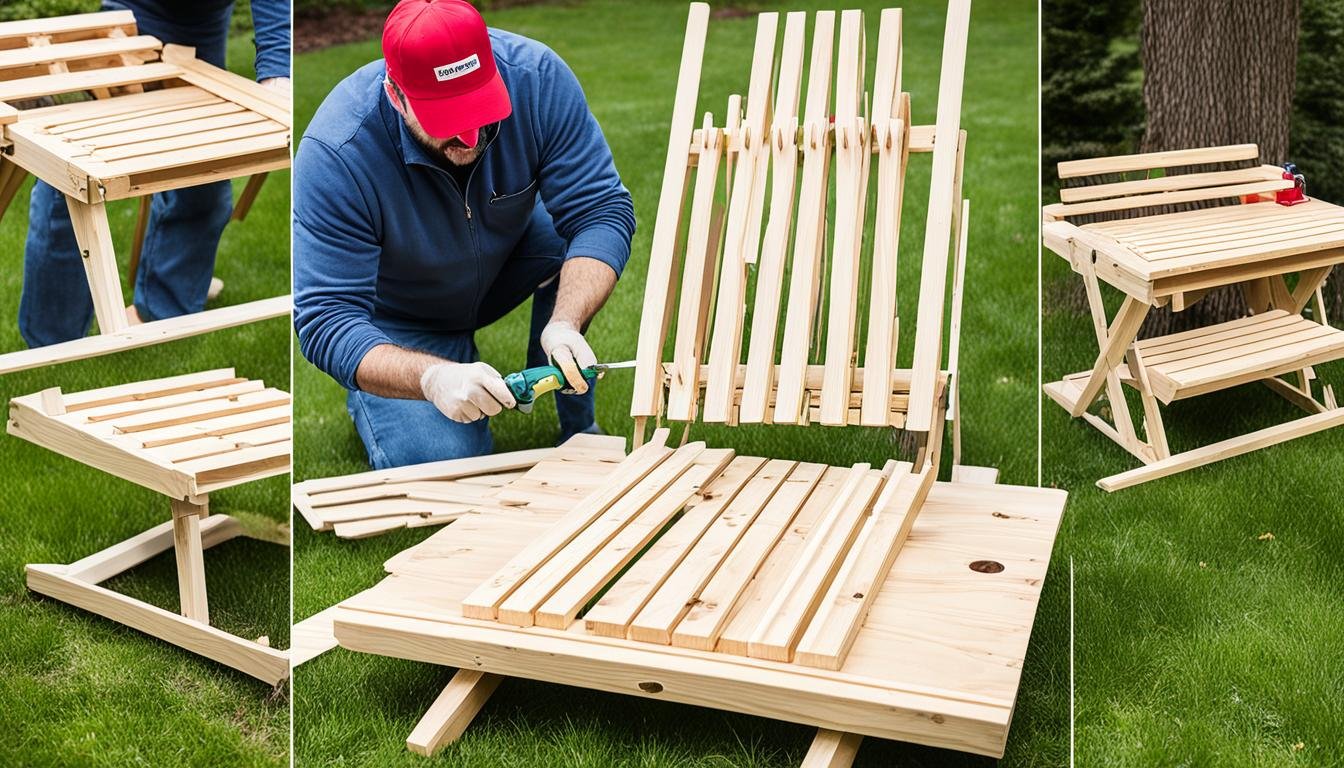
DIY Making a Outdoor Deck Chair: A Step-by-Step Construction Guide
Ready to make your own outdoor chairs? You need to get ready and understand the steps. This guide will help you make a deck chair that looks good and works well outdoors. Let’s start this project to have a fun and successful build.
First, pick where you want to work. Choose a flat, bright, and big space for your wood and tools. Safety first, so wear gloves and eyewear. Check that all your tools work before you begin.
- Gather Your Materials and Tools:
- Lumber cut to size (dimensions will vary based on your specific design)
- Outdoor-grade screws and hardware
- Wood glue (optional for added strength)
- Power drill and drill bits
- Miter saw or handsaw
- Measuring tape
- Sandpaper or a power sander
- Paintbrush or sprayer for staining (optional)
- Cutting the Wooden Pieces:
Cut your lumber as the plan says. Be exact: measure twice, cut once.
- Assembling the Frame:
Put the cut pieces together to make your chair’s frame. Make sure every joint is tight. Use screws and maybe wood glue for extra strength.
- Attaching the Seat and Backrest:
Fix the seat and backrest to the frame. Keep the space between them even. This will make the chair look good and breathe. Smooth any sharp edges for a comfy sit.
- Final Touches:
When your chair is built, sand it to remove splinters. Then, if you want, stain or seal it. This protects the wood and highlights its beauty.
Use the table below as a guide through each step of building your chair. It lists what you need and gives tips for each part of the project.
| Step | Materials and Tools | Construction Notes |
|---|---|---|
| 1. Planning | Design plan, notepad | Make sure your chair will be comfortable and stylish. |
| 2. Cutting | Lumber, miter saw/handsaw | Cut the wood as your design plan specifies. |
| 3. Assembling Frame | Screws, power drill, wood glue | Check that the frame is straight and all joints are tight. |
| 4. Attaching Slats | Seat and backrest slats, measuring tape | Evenly space the slats for looks and function. |
| 5. Finishing | Sandpaper, stain/sealant, paintbrush | Smooth the chair and then apply a finish if you want. |
Following this guide, you will build a deck chair perfect for your outdoor space. Take it step-by-step. Make sure everything is tight, smooth, and beautifully finished. You’ll end up with a great deck chair to enjoy for many years.
This guide lays out all steps for building a deck chair. But, the special touches you add will make it unique. Be proud of your hard work. Look forward to relaxing in your new chair.
Essential Tools and Equipment for Building Deck Chairs
Starting your DIY outdoor furniture project? You’ll need the right tools. With the best basic toolbox, you can make your dream deck chairs a reality. Here, find the essential tools list perfectly matched with your skill level, whether you’re starting out or have lots of experience.

The Basic Toolbox – What You’ll Need
Building outdoor chairs might seem tough for beginners. Yet, a few key tools can simplify the process. Let’s look at the essential tools for making a cozy and stylish deck chair. These tools will bring comfort to your outdoor areas.
- Miter Saw: For precise cutting and shaping of lumber — a cornerstone in your toolbox.
- Drill: Essential for creating pilot holes and fastening pieces together securely.
- Measuring Tape: Accuracy is vital, and it starts with correct measurements.
- Sandpaper: To ensure a smooth finish and prevent splinters, sandpaper is indispensable.
With these tools, you’re ready to build outdoor furniture. Create pieces that withstand the weather and showcase your DIY talent.
Advanced Tools for Experienced DIYers
If you’re experienced and crave finer techniques, check out these advanced tools. They’re perfect for enhancing craftsmanship and adding unique touches to your deck chairs.
| Advanced Tool | Function | Recommended For |
|---|---|---|
| Pocket Hole Jig | For creating strong, hidden joints that enhance the look and durability of your furniture. | DIYers seeking a polished, screw-free appearance. |
| Orbital Sander | Efficiently achieves a gorgeously smooth surface, preparing wood for finishing touches. | Those who aim for a professional-grade texture and feel. |
| Clamps | Secures wood pieces as they’re being joined, ensuring precise alignment and bonding. | Anyone needing an extra set of ‘hands’ during assembly. |
| Router | An artist’s touch to add ornamental edges and intricate details. | Crafters who want to add unique, personalized flourishes. |
Equip yourself with these advanced tools for deck chair making. You’ll tackle any project challenge. These tools help seasoned DIYers reach new levels of craftsmanship, making every joint, cut, and finish feel mastered.
Assembly Tips and Techniques for a Sturdy Chair
Starting on your outdoor deck chairs? The assembly process matters as much as the pieces. Use the right techniques for building sturdy outdoor furniture to make something both beautiful and long-lasting. Here are some top tips for assembling deck chairs for great results.
Pre-Assembly Planning: Check all parts are there and cut right before starting. Get your materials and tools ready. Being organized is a key best practice for DIY chair assembly.
Glue and Screw: Use both screws and wood glue for strength. Glue on joints before screwing adds extra stability to your chair.
Pre-Drill to Prevent Splitting: Drill holes before using screws. It stops the wood from splitting and keeps your chair strong and lasting longer.
Tight is Right: Make sure everything fits snugly. But don’t tighten too much, as it can harm the wood or screws.
Check for Square: Keep checking the chair is square and stable as you build. Good alignment means a good look and safe use.
Order of Assembly: Follow the instructions step by step. Usually start with the base, then the seat, backrest, and armrests last.
Remember: Patience is the carpenter’s greatest tool. Take your time, double-check your measurements, and approach challenges methodically.

| Assembly Step | Tool Used | Tip |
|---|---|---|
| Attach Legs to Seat Frame | Drill | Use wood glue before driving in the screws for added strength |
| Secure Backrest Slats | Hammer | Space slats equally and use a jig or spacer for consistency |
| Connect Armrests | Screwdriver | Pre-drill holes on armrests to match with the frame alignment |
| Final Inspection | Level | Ensure all parts are level and flush for ultimate comfort |
To wrap up, using these tips for assembling deck chairs and techniques for building sturdy outdoor furniture will lead to a strong, reliable chair. And following best practices for DIY chair assembly isn’t just about quality. It’s about the joy of making your own outdoor furniture.
Finishing Touches: Sanding, Staining, and Sealing
Now that your outdoor deck chair is ready, it’s crucial to make it weather-resistant. Preparing outdoor furniture for the elements is key to ensuring it lasts. Key steps include sanding, staining, and sealing to protect wood from the sun, rain, and moisture.
Prepping Your Chair For the Elements
Start by sanding your chair to smooth any rough spots. This not only makes it look better but also prepares it for staining. It’s important for a smooth finish and to avoid splinters. After sanding, pick a stain or sealant that beautifies the wood and protects it. Using a sealant weatherproofs deck chairs against UV rays and moisture, which can damage the wood.
Choosing the Right Finish for Your Climate
Picking the right finish depends on where you live. Climate considerations for deck chair finishes are crucial. In humid or rainy areas, go for a penetrating oil finish or a water-based product. They help the wood adapt to temperature changes and reduce damage. In drier places, a varnish or polyurethane finish works best for their thickness and protection. This ensures your outdoor furniture lasts longer in your specific climate.
Creative Painting and Staining Ideas for Personalization
Add your own touch to your project with creative colors. Painting and staining options for outdoor furniture include colorful paints. You can try a two-tone effect, stencils, or a distressed look for a vintage feel. These creative touches not only make your deck chairs resistant to weather but also eye-catching. Adding color lets you express your style and make a bold statement outdoors.

Following these steps is key for durable outdoor chairs. From preparing outdoor furniture for the elements to personalizing DIY patio seating with color, your choices show your care for detail. This lets you enjoy your handmade outdoor retreat with pride and comfort.
Conclusion
As we end this detailed guide on making an outdoor deck chair, let’s take a moment to think back. You’ve turned a dream into a real, hand-made piece of furniture for outside. This project took not just hard work, but also creativity and an eye for detail. You might feel proud, as making your own outdoor furniture enriches you personally.
In putting your deck chair together, you’ve learned about choosing materials and techniques for a strong and good-looking result. As your deck chair is now complete, take a moment to admire your handiwork. It’s a sign of your hard work, showing off your taste and the sweat you poured into something special for your outdoor space.
Enjoying your deck chair is just the start of enjoying your work. This is the beginning of many relaxing times and proud looks at what you’ve made. Let your deck chair be a cozy spot and inspire you to do more projects. Here’s to many days and nights spent in your self-made chair, a true prize for your DIY skills.
FAQ
What are the benefits of building your own outdoor deck chair?
What are the different styles of outdoor chairs to choose from?
How can I customize my DIY deck chair to match my outdoor decor?
What factors should I consider when designing my outdoor deck chair?
What type of wood should I choose for my outdoor chair?
Are there alternatives to traditional wood for outdoor furniture?
Can you provide a step-by-step guide for building a deck chair?
What tools do I need to build a deck chair?
What tips can you provide for assembling a sturdy deck chair?
How should I finish my outdoor deck chair?
Can I paint or stain my deck chair for a unique finish?
Source Links
- https://www.thespruce.com/outdoor-chair-plans-4690705
- https://www.kaltimber.com/blog/crafting-comfort-a-step-by-step-guide-to-building-your-own-diy-deck-chair
- https://www.woodshopdiaries.com/diy-chunky-outdoor-chair/