

A staggering 80% of American households engage in some form of DIY home improvement project each year. Among the most practical and rewarding of these endeavors is building a shed. Whether you desire extra storage, a secluded workspace, or a custom retreat, the path to constructing a robust outdoor shed building can be fulfilling. With this ultimate guide, you’ll grasp shed building tips and follow a comprehensive step-by-step shed building approach. From choosing shed building materials to finalizing a beautiful wooden shed construction, every stage of DIY shed construction will be a learning curve, transforming your backyard into a bastion of utility and charm.
Key Takeaways
- Understand the various stages of shed assembly guide for a successful build.
- Learn how to create a functional and aesthetically pleasing storage space.
- Explore the best techniques and materials for an enduring outdoor shed building.
- Make informed decisions on the legality and planning for your shed building project.
- Ensure your shed construction stands the test of time with solid foundations and quality materials.
Before You Start: Legal and Planning Considerations
Embarking on building a shed is an exciting venture, but before diving into the construction phase, you need to navigate the maze of legalities that govern such structures. Securing the right shed permits is not just a bureaucratic checkbox. They are critical in ensuring that your shed meets all safety standards and complies with zoning regulations and building codes. Consequently, avoiding potential fines and forced dismantling of your hard work hinges on this preliminary step.
Understanding the intricacies of shed placement on your property can save you from future headaches. Each locality adheres to its specific set of guidelines that impact where you can situate your shed. These rules are in place to maintain the orderly development of land and to minimize conflict between landowners.
Moreover, shed size restrictions are equally important. These limitations play a significant role in preserving the aesthetic and environmental integrity of neighborhoods, ensuring that individual projects do not overshadow the communal landscape.
Here’s a handy table of what to consider when planning your shed:
| Consideration | Description | Importance |
|---|---|---|
| Permits | Official documents that grant permission to start construction | Legal requirement to avoid penalties |
| Zoning Regulations | Local rules governing land use and structure placements | Ensures your shed aligns with community space management |
| Building Codes | Standards for construction to ensure safety and quality | Guarantees the structural integrity of your shed |
| Shed Placement | Decision on where to construct the shed on your property | Minimizes disputes and adheres to property line setbacks |
| Size Restrictions | Limits on the dimensions of your shed | Keeps the shed proportionate to your property size and neighborhood |
To get started on the right foot, make visiting your local municipal planning office a priority. There, you can obtain the necessary applications for your shed permits, gain a detailed understanding of the zoning regulations, and wrap your head around the building codes applicable in your area. This proactive approach will pave the way for a smooth and uninterrupted building process.
When considering shed placement and grappling with shed size restrictions, always factor in your current and future needs. While erecting a massive storage unit might seem appealing, it may not be practical or permissible. A balance between ambition and guidelines will result in a structure that complements its surroundings and serves its intended purpose for years to come.
Designing Your Shed: Maximizing Efficiency and Aesthetics
Embarking on the journey of designing your shed, considerations for shed dimensions are crucial to ensure the structure fits perfectly within your landscape’s contour while addressing your spatial needs. Deliberation over the shed building materials is equally important, emphasizing durability and how they complement your home’s existing aesthetic. And when it comes to realizing a custom shed design, aligning with your vision of a dream outdoor building, individuality and purpose should drive your decisions. After all, a functional shed design not only adds value to your property but transforms utility into art.
https://www.youtube.com/watch?v=BLk_CAMmQPc
Choosing the Right Dimensions
Identifying optimal shed dimensions begins with acknowledging the primary use of your shed. Will it be a cozy workshop, a storage haven, or perhaps a garden retreat? Measure the available space, considering clearance for doors and pathways, ensuring that your shed fits just right without overwhelming your garden space.
Selecting Shed Building Materials
The selection of the right shed building materials pivots on climate adaptability, maintenance levels, and personal aesthetic preference. From classic wood to modern vinyl and resilient metal, the options are diverse. Cast a critical eye on the long-term performance of each building material to ensure your investment matures gracefully over the years.
Customizing for Functionality
To culminate your endeavor with a custom shed design, engrain your unique requirements through tailored shelving, ergonomic workspaces, or potting benches. Windows placement and door type are not mere details but the essence of a functional shed design—integrating ease of access with ample lighting, all built around your day-to-day activities.
Foundations for Stability: Selecting the Right Base
Creating a durable and reliable shed starts with laying a proper foundation. Depending on your needs and the characteristics of your building site, the choice of shed foundations varies. Factors to consider include the type of soil, the level of moisture, and the average climate of your area. A sound base will keep your shed level and protected from moisture, pests, and other elements that could compromise its structure.
One popular option for shed base materials is a gravel base, which offers excellent drainage and can be relatively easy to install. It is a particularly good choice if you anticipate high moisture levels or if your shed will house items that could be affected by dampness. Another stable option is a concrete slab, which provides a flat, durable surface that is ideal for heavy sheds, such as those intended for workshops or storage of large equipment.
Alternatively, pier blocks can offer a cost-effective and less labor-intensive approach. They are typically used in conjunction with a wooden frame to elevate the shed and protect it from direct contact with the ground. This can be beneficial in preventing wood rot and termite infestation.
| Foundation Type | Pros | Cons | Best For |
|---|---|---|---|
| Gravel Base | Improved drainage, easy to level | May shift over time | Areas with high moisture |
| Concrete Slab | Durable, pest-resistant | Permanent, challenging to install | Heavy-duty use, large equipment storage |
| Pier Blocks | Economical, quick setup | May require additional reinforcement | Raised sheds, small to medium structures |
Whichever foundation you choose, remember to always level the site and prepare adequately before installation. This ensures your shed foundations remain solid, providing the necessary support for your outdoor structure for years to come.
Constructing the Floor Frame: Durability and Precision
A solid foundation for your shed starts with meticulous shed floor construction. Your aim is to create a sturdy shed floor that can bear the load and provide years of service. It begins on the ground, with a square and level base that sets the stage for the entire structure’s integrity.

Materials for a Sturdy Floor
Selecting the right floor frame materials is pivotal in achieving durability. Opt for pressure-treated lumber, known for its resistance to rot and pests, to ensure a reliability for your shed’s base. Plywood or oriented strand board (OSB) are popular choices for the flooring itself, thanks to their structural strength and ease of installation.
Ensuring a Square and Level Base
Your shed’s longevity is contingent upon the initial and crucial step of constructing a square and level base. Use a carpenter’s square and a builder’s level to align your shed properly. Accurate measurements and meticulous adjustments during this early phase will prevent complications during the assembly of your shed’s walls and roof.
| Material | Properties | Recommended Use |
|---|---|---|
| Pressure-Treated Lumber | Moisture and pest resistant | Frame and Joists |
| Plywood | Strong and durable | Flooring surface |
| Oriented Strand Board (OSB) | Cost-effective and sturdy | Flooring surface when on a budget |
Absolute precision is non-negotiable when it comes to laying a sturdy shed floor. The time you invest in careful planning and using quality floor frame materials will yield a dependable and robust base for all your shed endeavors.
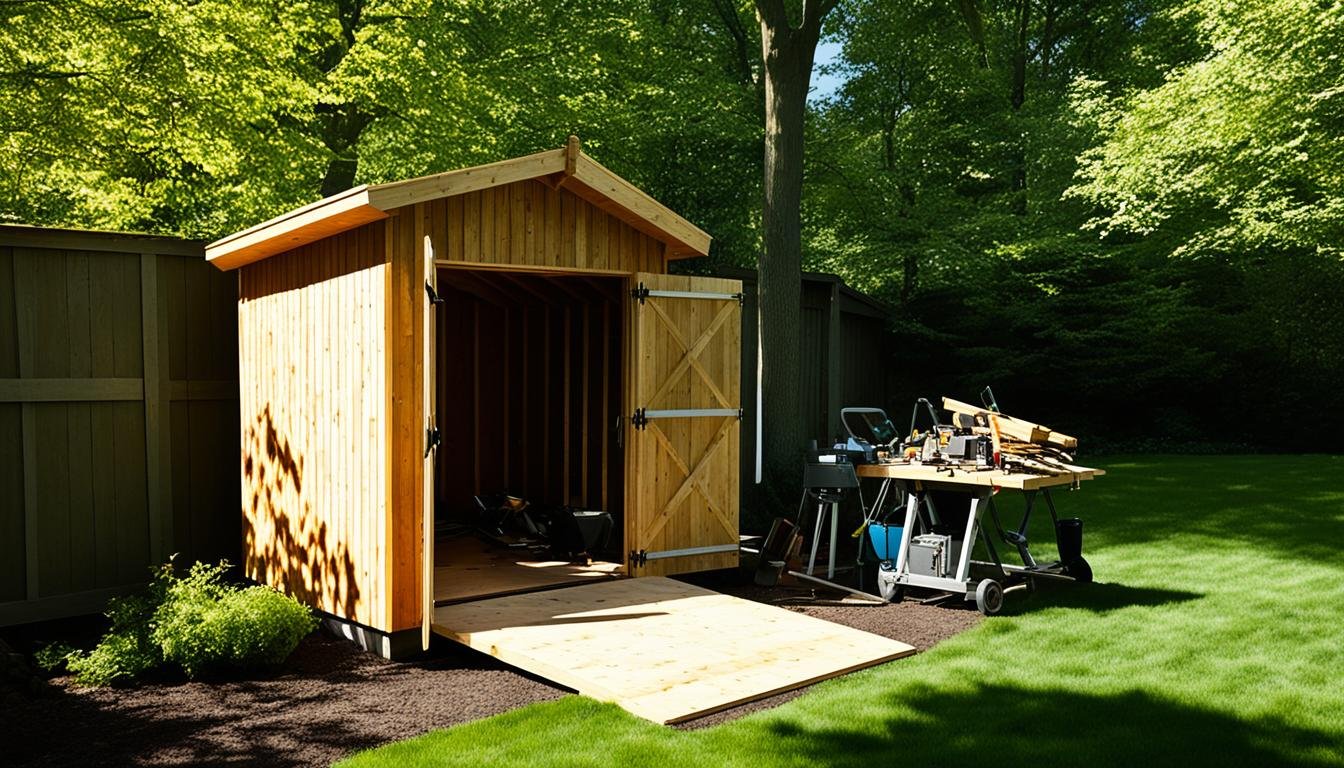
Building a shed: Erecting Walls and Ensuring True Angles
When you embark on shed wall construction, precision is key. Wall framing serves as the skeleton of your outdoor structure and demands attention to detail to ensure the longevity and safety of your shed. Starting with a solid plan for assembling shed walls is essential for anyone looking to add a functional and robust shed to their backyard.
Following a systematic approach, begin with laying out the wall framing on a flat surface. From the bottom sill to the top plate, every timber should be carefully measured and cut to maintain true angles. Ensuring each corner is square is fundamental to the structural integrity of your shed. Accurate angles are vital in wall framing, which not only support the roof but also define the overall form of the shed.
Assembling and Raising the Walls
You will need to work methodically, often enlisting assistance to securely and safely raise the walls into place. A well-assembled wall fits snugly into its designated spot and should be braced appropriately to avoid any movement that could disrupt the precise angles you’ve worked hard to achieve.
Using String Lines for Accuracy
One of the oldest tricks in the book, employing string lines, remains one of the most reliable methods to ensure the walls are true and plumb. String lines act as a visual guide when raising the walls, giving you a straight edge that indicates any deviations from the true angles. By adjusting the position of the wall to align with the string line, you establish a level reference point for the entire structure.
While working on shed wall construction, remember that each step is interconnected. The wall framing holds the key to a sturdy and attractive shed, so dedicating time to perfecting the assembly process will pay off in the long run. True angles aren’t just about aesthetics; they’re about crafting a space that will stand through the seasons, keeping your instruments, machinery, and other storage items safe and secure within its walls.
Roof Construction: Trusses and Sheeting
When you’re ready to tackle the shed roof construction, you’re not just building a shelter—you’re ensuring the durability and longevity of your entire shed. It all starts with building roof trusses, which are the framework to support your roof. The structure of these trusses is essential as they hold everything together and must withstand various weather conditions throughout the year. You’ll want to ensure accuracy in measurements and cuttings, securing each piece into place with precision.

After your trusses are securely in place, the next step is to choose and install the roof sheeting materials. Selecting the right materials is not just a matter of aesthetics; it’s about practicality and preparing for whatever the elements might throw at your shed. Be it metal, asphalt shingles or wooden sheathing, every material has its pros and cons. Important factors to consider include the climate you live in, the pitch of your roof, and the longevity you expect from your roofing.
- For longevity and ease of maintenance, metal sheeting is a popular choice.
- If you’re looking for a traditional look, wooden sheathing might be the way to go, ensuring you treat it against moisture and pests.
- Asphalt shingles are a cost-effective option, providing an appealing look and satisfactory durability.
Installing the roof sheeting should be approached with care—appropriate fasteners should be chosen based on the type of material you’re using, and the process should be executed with an eye for detail, ensuring no gaps or misalignments that could compromise the roof’s integrity. In this phase of shed roof construction, patience and attention to detail will pay off in the form of a robust and weather-resistant roof over your shed.
Remember, building a shed is not only about creating storage space but also about crafting a structure that stands robust, come rain or shine. With the roof trusses and sheeting installed correctly, you’ll have peace of mind knowing that your belongings are safe, and your shed is secured against the elements for years to come.
Choosing Siding and Roofing Materials for Longevity
When it’s time to select the materials that will form the protective skin of your outdoor structure, the sheer variety of shed siding options and shed roofing materials can seem overwhelming. A primary goal in your decision-making should be focusing on durable shed materials known for crafting long-lasting shed exteriors. These materials not only contribute to the overall durability of your shed but also enhance its aesthetic appeal and can significantly affect maintenance levels over time.
Shed Siding Options
For the siding of your shed, you will want to weigh the pros and cons of popular materials like wood, vinyl, and metal. Wood siding has timeless charm and offers a traditional look, yet may require more maintenance over time. Vinyl siding wins points for its low maintenance and durability against the elements. On the other hand, metal, though not as warm in appearance, promises exceptional longevity and resistance to pests.
Roofing Material Considerations
Your choice in roofing should complement your siding in both style and longevity. Asphalt shingles, metal roofing, and rubber roofing are some common choices among shed builders. Asphalt shingles offer a traditional look and a cost-effective solution, while metal roofing boasts durability and minimal upkeep. Rubber roofing, although less common, provides a robust and eco-friendly alternative with excellent waterproofing capabilities.
| Material Type | Siding | Roofing | Maintenance Level | Expected Longevity |
|---|---|---|---|---|
| Wood | Traditional Aesthetics | Cedar Shakes | High | 15-30 years |
| Vinyl | Modern Look | Asphalt Shingles | Low | 20-30 years |
| Metal | Contemporary Finish | Metal Panels | Very Low | 40-70 years |
| Rubber | Not Applicable | EPDM Roofing | Low | 30-50 years |
Ultimately, your selections should be informed by your climate, the shed’s intended use, and how much maintenance you’re willing to perform. Aligning these aspects with your aesthetic preferences will ensure your shed stands the test of time while looking great in your backyard. Remember, investing in quality materials from the outset is fundamental to a shed that lasts for decades, rather than just a few years.
Doors and Windows: Adding Functionality and Style
When it comes to outfitting your shed with shed doors and shed windows, the choices you make are essential for blending functionality with aesthetic appeal. Selecting the right features not only makes your shed more user-friendly but also enhances its overall design. Let’s walk through some door installation tips and notions on window placement that will help you construct a shed that stands out.
Door Types and Installation Tips
Choosing the right type of door for your shed is pivotal. Perhaps a durable, lockable steel door suits your security needs, or maybe a classic wooden barn door aligns with your aesthetic preferences. No matter your choice, accurate door installation ensures longevity and ease of use. Here are a few installation tips:
- Pre-hang your door frame to simplify installation and ensure a level fit.
- Use a spirit level to maintain plumb and ensure the door swings open and closed effortlessly.
- Install weather stripping to protect against the elements and maintain the interior environment.
Window Selection and Placement
Shed windows not only add natural light but can also provide cross ventilation, making your space more comfortable and visually appealing. Consider the function of your shed when deciding on window placement; for example, a workbench area can benefit from overhead natural light, whereas storage spaces might require less illumination. Here are essential tips for window placement:
- Position windows on the side of the shed that receives the most daylight.
- Ensure windows are high enough for privacy yet low enough for adequate light exposure inside.
- Factor in the surrounding landscape to avoid blocked views or direct wind paths.
By incorporating these elements thoughtfully, your shed will not only perform better but also become a feature that complements your outdoor space.
Conclusion
Embarking on your shed building journey brings this comprehensive guide to a close. With our focused approach on DIY shed construction tips, you’ve been equipped with the knowledge to tackle every phase of development, from initial planning to the final touches of your outdoor structure. You’ve learned the importance of adhering to local legal requirements, designing with efficiency and aesthetics in mind, and selecting high-quality foundations and materials—all vital to the success of your project.
A summary of the shed building process demonstrates that meticulous preparation and attention to detail can yield a robust and visually appealing shed. It’s a reminder that the right tools, materials, and guidance are key to transforming your vision into reality. Throughout the construction of your floor frames, walls, and roof, to the choice of siding and the installation of doors and windows, your personalized touch has turned a blueprint into a functional space.
Consider this shed building conclusion as both an ending and a beginning—the completion of your project and the start of new possibilities for your home and lifestyle. By planning thoroughly, securing the proper permits, and investing in durable materials, you’ve not only built a structure but also created the potential for endless enjoyment and utility. As you stand back and admire your handiwork, let this experience inspire future DIY ventures and the continued transformation of your space.
FAQ
Do I need a permit to build a shed?
What should I consider when designing my shed?
What type of foundation should I use for my shed?
How do I ensure a sturdy shed floor?
How should I assemble and raise the shed walls?
What materials should I use for the roof of my shed?
What are the best siding and roofing materials for my shed?
How do I choose the right doors and windows for my shed?
What are the key steps in building a shed?
What is important to remember when building a shed?

Servicing various areas in Utah, Wasatch Summit and Salt Lake County, including but not limited to Eagle Mountain, Provo, Spanish Fork, Saratoga Springs, Lehi, Salem, Payson, Elk Ridge, and more, we cater to homeowners with newly built homes featuring unfinished basements. Our team of skilled professionals understands the intricacies of basement framing and uses state-of-the-art techniques and tools to exceed our clients’ expectations. (801) 687-8722